

Around the World: The Spine (a mini-sequence) by Kate Heffernan
The final installment of my “Around the World” series brings us to the spine! During my 200 hour Teacher Training I had my first experience with restorative yoga and… I was not a fan. I had only practiced strong Flow up until that point and enjoyed an exhausted Savasana where I had no choice but to relax. So when presented with several poses over the course of a few hours that all felt like Savasana, I was going out of my mind. It took a few years of teaching yoga to mature enough to enjoy a restorative practice. For me it was an acquired taste, like dark chocolate - which I couldn’t appreciate when I was younger, and now it’s a much appreciated treat. Now, restorative yoga is one of the mainstays in my practice and my teaching. One of the tenets of restorative yoga is to move the spine passively in every direction, of which there are six: back-bending, forward folding, side-bending right and left and twisting right and left. Since the spine houses a crucial part of the nervous system, the spinal cord, these poses are not just useful muscularly to keep the body happy and healthy they can also help to keep your inner workings running smoothly as well. The following poses not only move the spine in every direction, but they do so passively, which allows for the muscles to relax into each shape which also gives your nervous system a boost by stimulating the relaxation response, which can help bolster your immune system, digestion, sleep patterns and overall sense of well-being.
Quick note: While not pictured, a blanket (or several) can make a world of difference in many of these poses. I've listed some ways to use blankets below, but when in doubt, if something doesn't feel quite right - add a blanket!
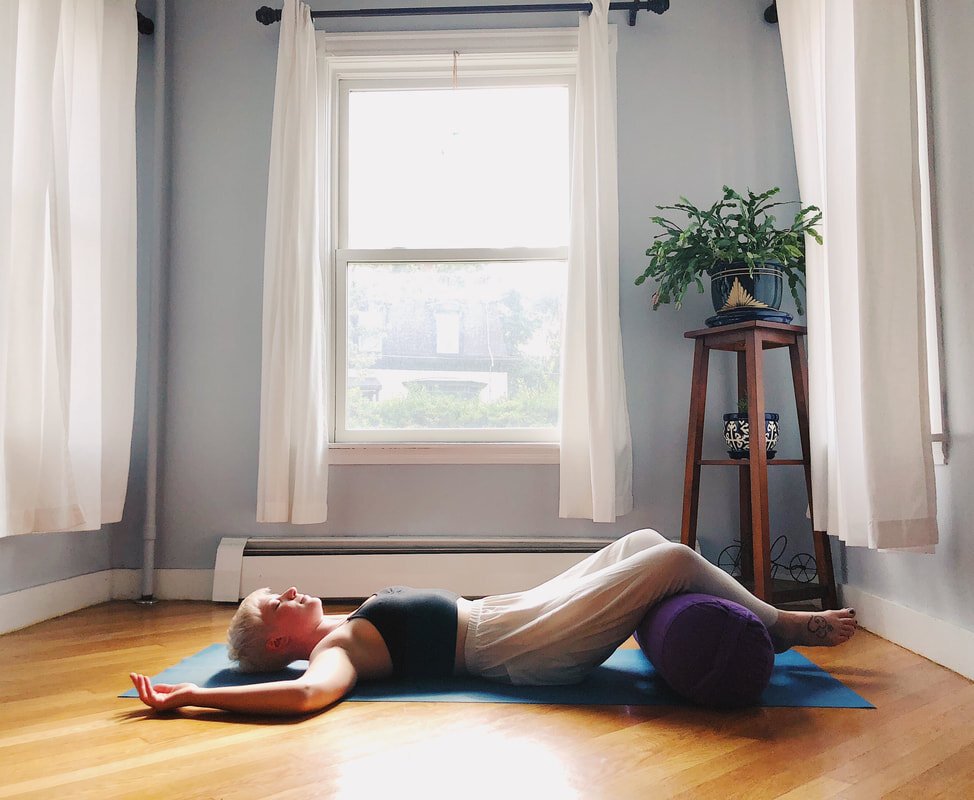
Supported Reclining Pose
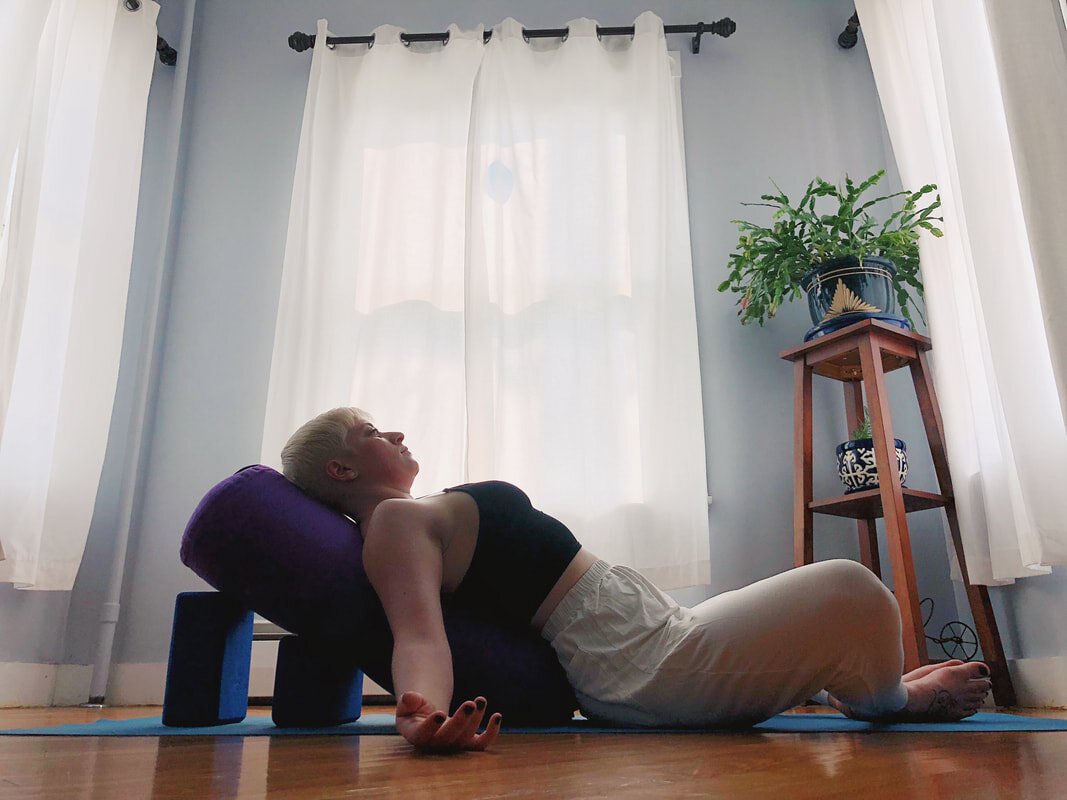
Set up with two blocks in a stair step orientation (one higher than the next) and angle a bolster vertically from the floor over the blocks. Sit on the floor just in front of the bottom edge of the bolster and lay back allowing for as much of the spine to be supported as possible. Legs can be bent or straight, whatever is most comfortable. When in doubt, aim for symmetry over asymmetry (pictured here with feet together, knees wide in Baddha Konasana Bound Angle Pose). Let arms relax off to the side and stay for 5-10 minutes.
Tips and Modifications:
No bolster? You can roll up a blanket and use that beneath the spine, or just use the two blocks - highest one under the head and the lower one beneath the shoulder blades.
Low back or neck feel congested? Place a blanket under the sit bones to help lengthen the low back or under the base of the skull to help lengthen the neck.
Chest feeling overstretched? Place blankets under the forearms to create arm rests.
Planning on staying a while? Consider an eye pillow to put over the eyes to block out ambient light and a blanket to cover the body. When you aren't moving it can be surprising how quickly the body cools down. When the body is cold, it's very hard to relax.
Note: this pose can be used in place of a more traditional Savasana for those who do not want to lay flat on their back because of things like pregnancy, reflux, or stuffy nose/post nasal drip. This is also a shape that can help if falling asleep/snoring is an issue during Savasana.
Bolster Twist
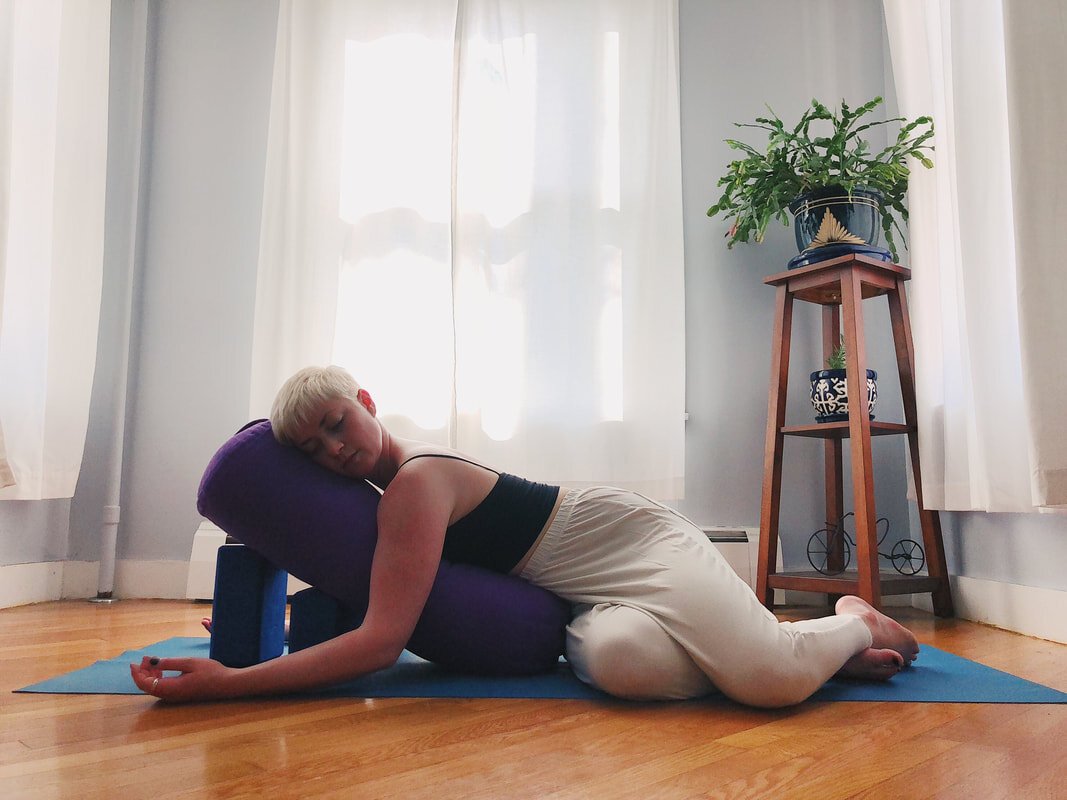
Set up with two blocks in a stair step orientation (one higher than the next) and angle a bolster from the floor over the blocks. Sit on the floor just in front of the bottom edge of the bolster and drop both knees over to the right, turn the torso to face the bolster and lay the front body down onto the bolster. Allow the arms to relax to the floor on either side of the bolster. Stay 2-5 minutes, repeat on other side.
Tips and Modifications:
Blocks feel uncomfortable? Lay the bolster flat to the floor.
Arms pushing the floor away? Or actively hugging the bolster? Try turning the palms towards the ceiling and widening the hands away from the bolster to avoid the arms engaging.
Knees or ankles pressing together? Place a blanket between the shins to pad up those joints.
Outer hip pressing into the floor uncomfortably? Place a blanket under the outer hip.
Neck or jaw discomfort? You guessed it - place a blanket under the head.
Side-Body Stretch
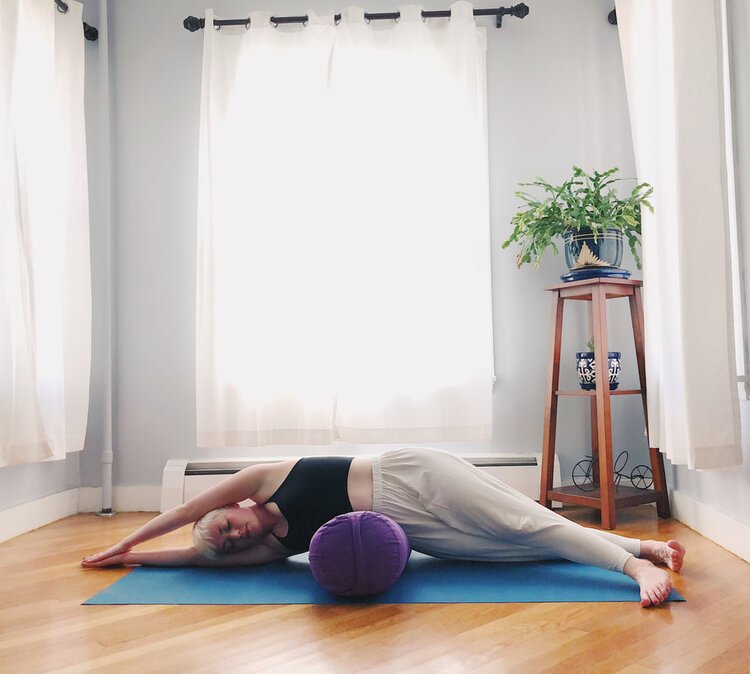
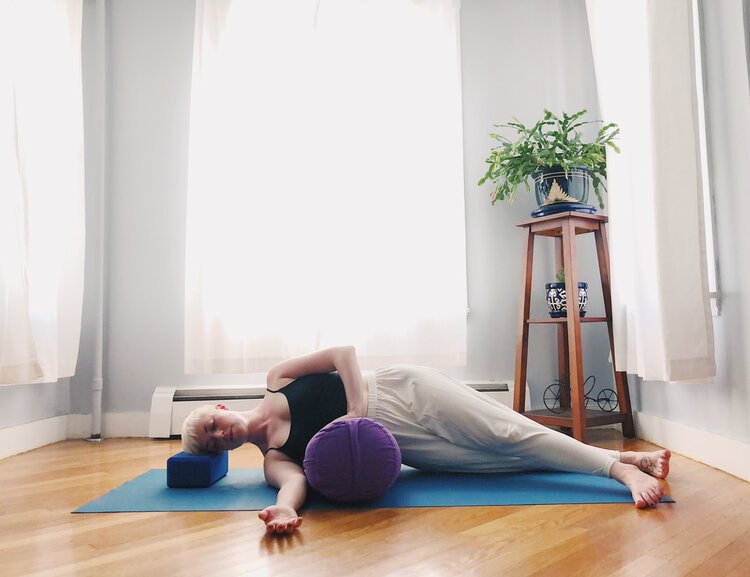
Place bolster down horizontally and lay down with the bottom most rib on the side waist in the middle of the bolster. Bottom arm can stretch out under the head as a support (as shown in first photo) or stretch out in front of the torso with head resting on block or blanket (as shown in second photo). Top arm can stretch overhead (as shown in first photo) or bend and rest in front of the torso (as shown in second photo). Legs can be straight and staggered (as shown in both photos) or bent. Stay for 2-5 minutes and switch to the other side.
Tips and Modifications:
No bolster? You can roll up a blanket and use that beneath the side waist.
Belly Bolster

Lay bolster down horizontally and place belly button down on top of bolster. Head can be supported by stacked hands (as shown in photo), supported by block or blanket or turned onto one cheek (aim to switch to other side of the face about halfway through the hold to even out the sides of the neck). Legs stretch out and relax. Stay 2-5 minutes.
Tips and Modifications:
No bolster? You can roll up a blanket and use that beneath the belly.
Bolster placement can move slightly up or down anywhere onto the belly as low as the hip crease, try moving the bolster around to find what feels best.
Supported Bridge
Lay the bolster down horizontally and sit on the front edge of the bolster with knees bent and feet on the floor. Slowly "crab-walk" the hands to the floor behind the bolster gently guiding the elbows, shoulders and head to the floor behind the bolster. Press down into the feet to lift the hips and adjust the bolster underneath the sacrum (a flat-ish triangular shaped set of fused vertebrae at the base of the spine, just above the tailbone.) Knees can stay bent or straighten out along the floor. Stay 2-5 minutes.
Tips and Modifications:
Low back discomfort? Keep both knees bent or try only straightening one knee out at a time. Also putting a blanket under the sacrum so the low back is lower to the floor can help.
No bolster? You can roll up a blanket or a block and use that beneath the sacrum.
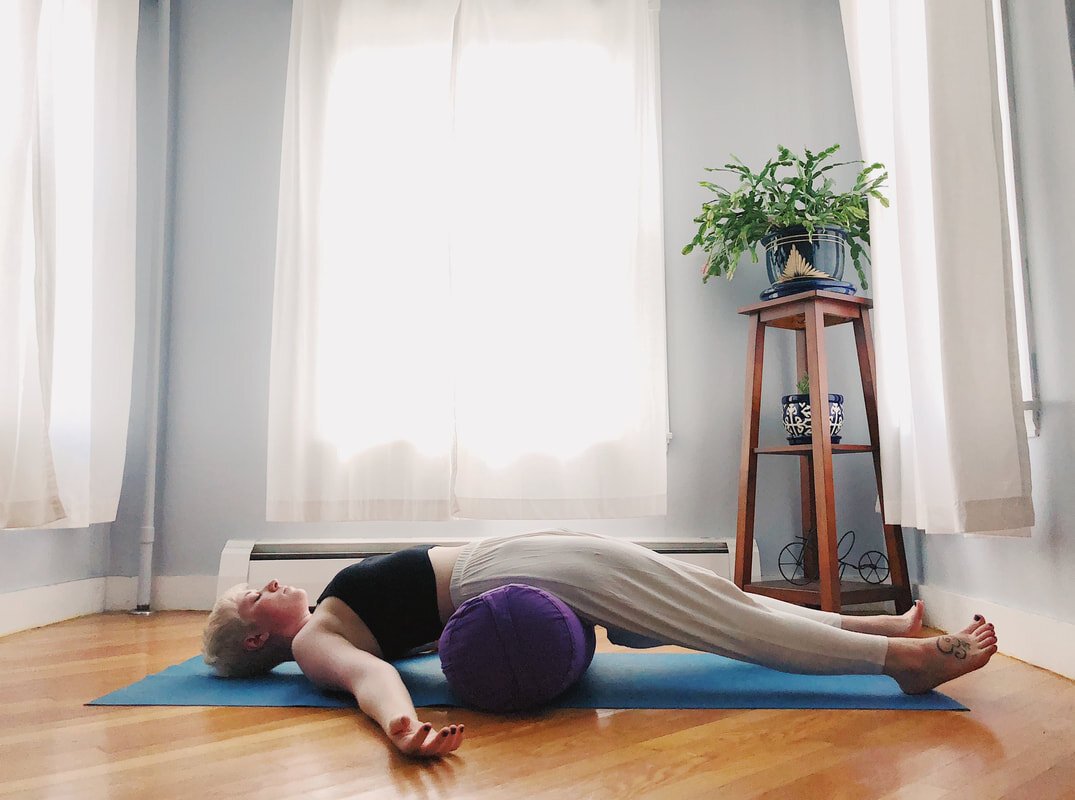
Savasana
Laying on the floor place bolster horizontally beneath the knees. Let the body get heavy and be supported by the floor, and rest. Stay for 5-20 minutes.
Tips and Modifications:
Feet pushing into floor in an uncomfortable way? Put blocks under the bolster to elevate.
Back of neck congested? Place blanket under head.
Planning on staying a while? Consider an eye pillow to put over the eyes to block out ambient light and a blanket to cover the body. When you aren't moving it can be surprising how quickly the body cools down. When the body is cold, it's very hard to relax.
All photos by Omar Robinson